
Checking your blood pressure is a simple and important part of maintaining good health. However, it is also something that many people find confusing and intimidating. This guide will give you the step-by-step information you need to know about checking your blood pressure at home.
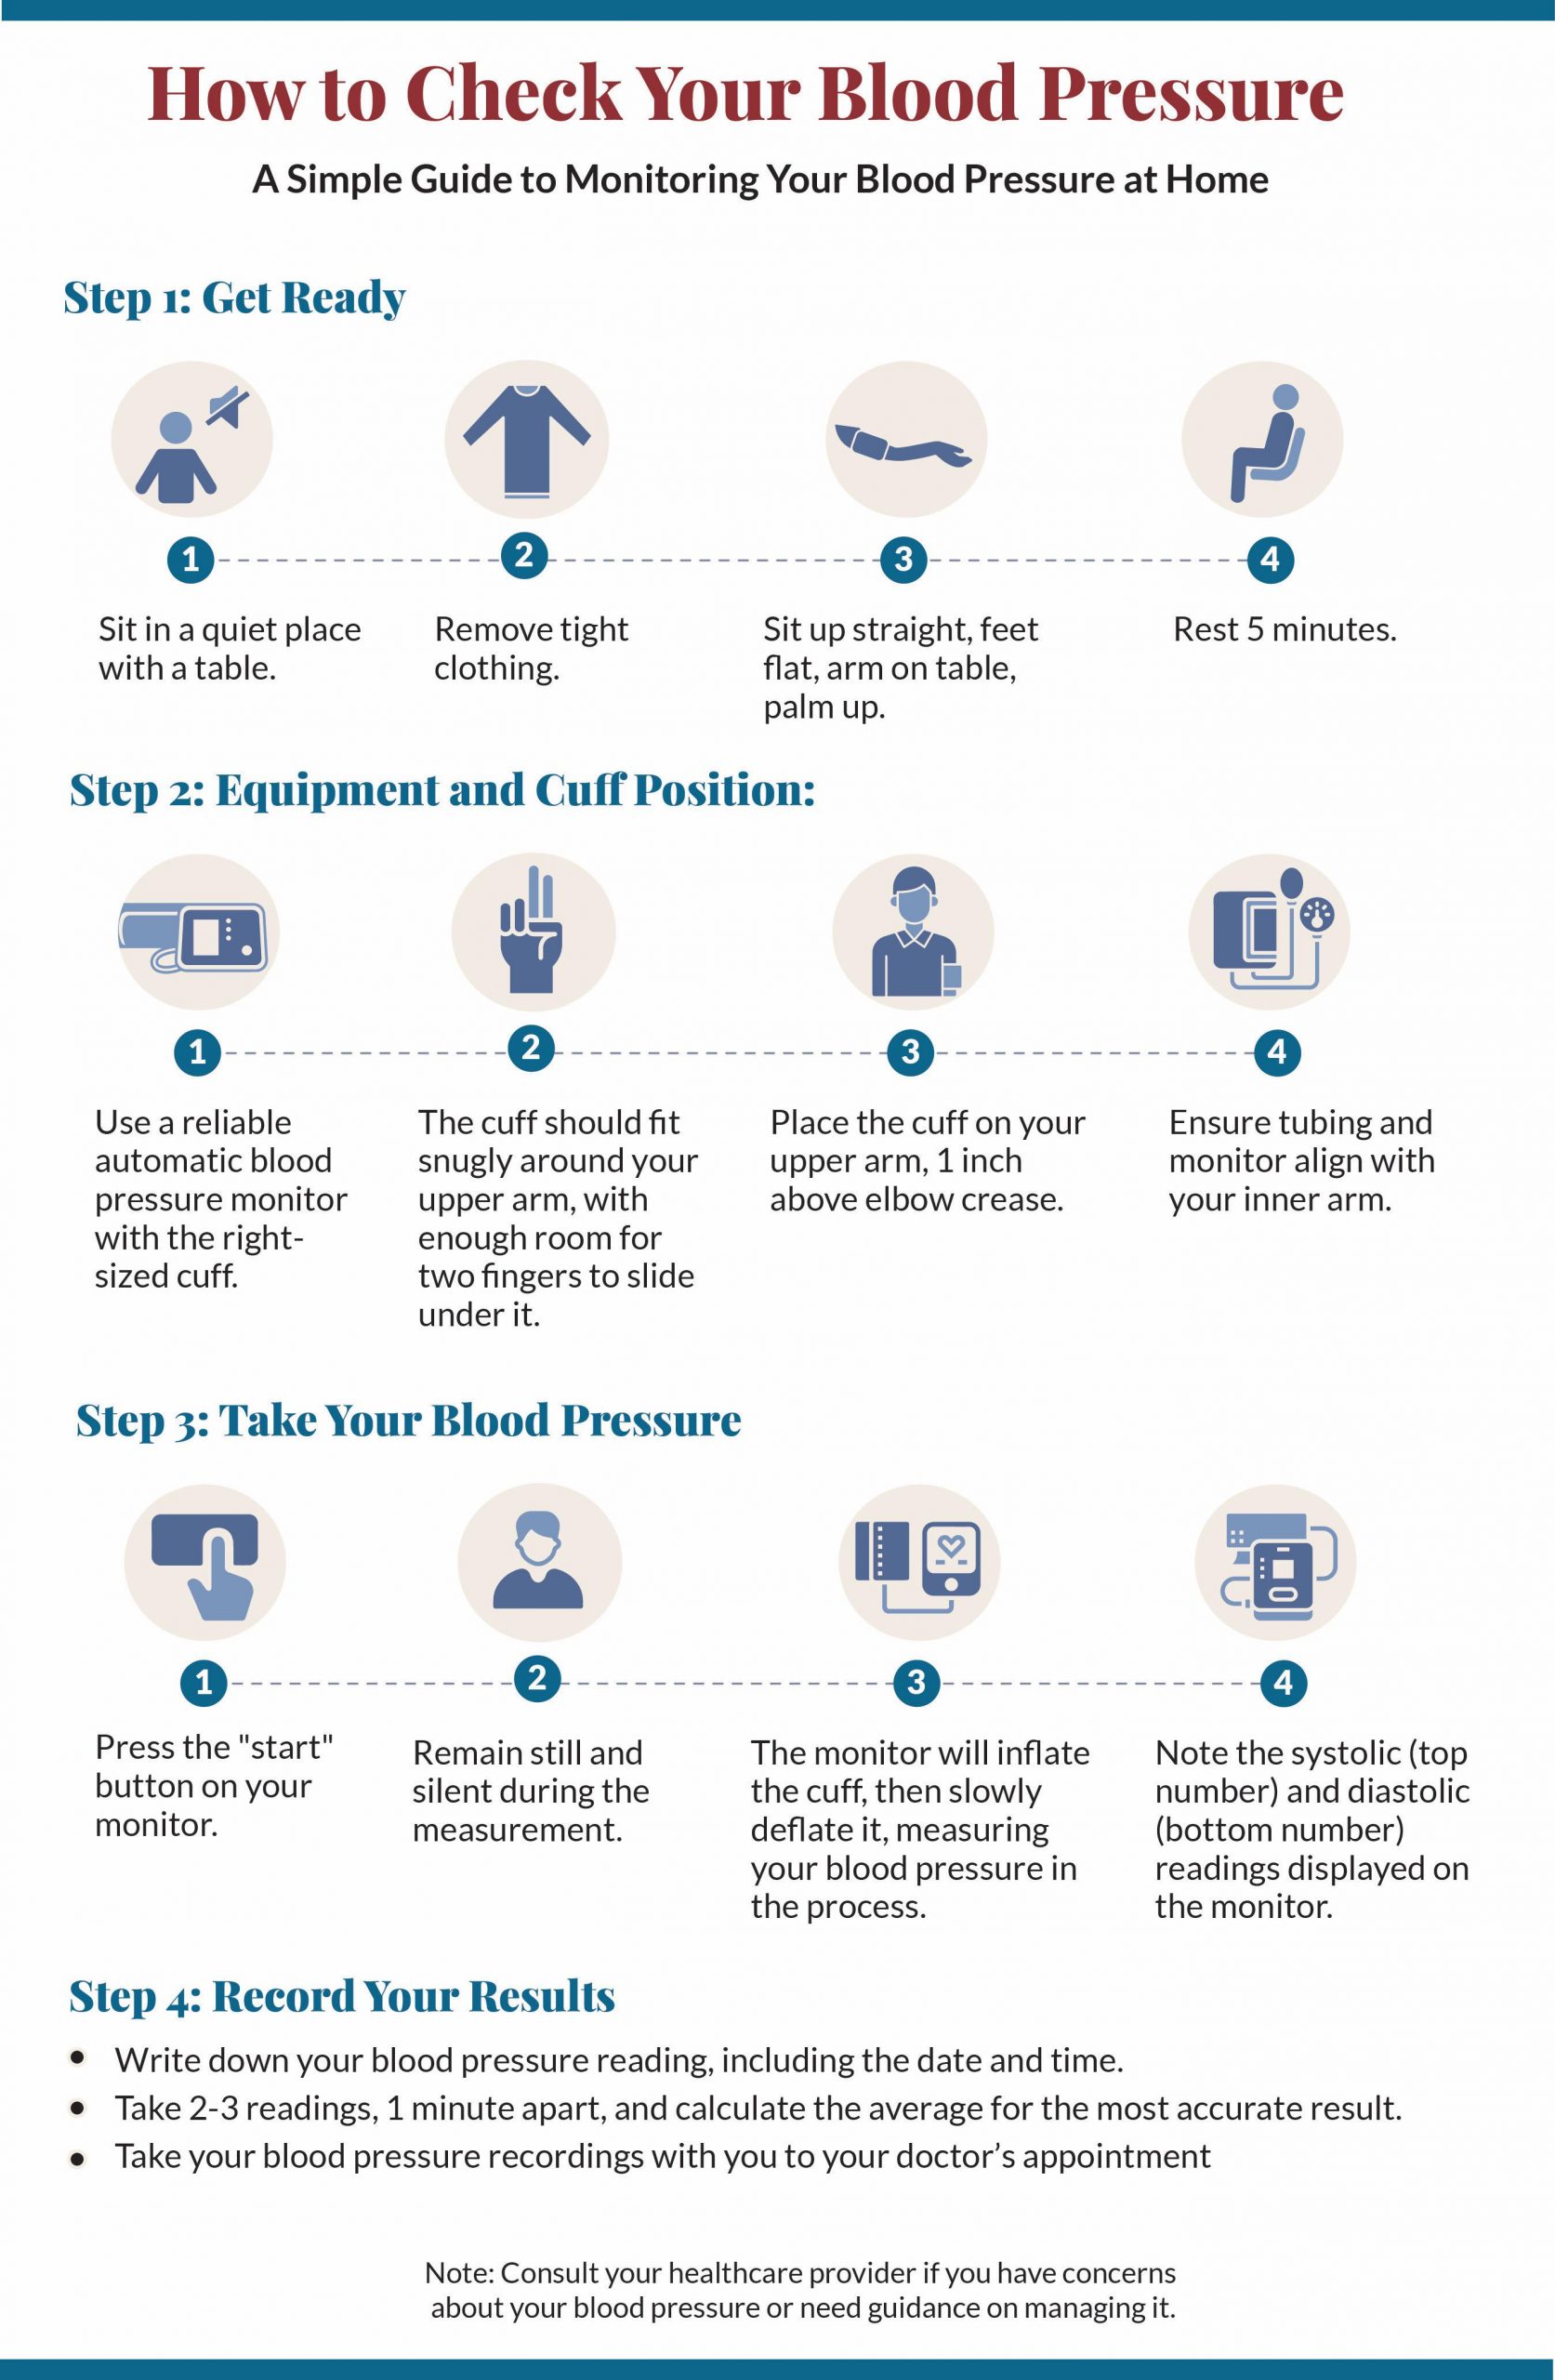
1. Get Ready
Make sure you have all the equipment you need. You’ll want to make sure that when it comes time to check your blood pressure, there’s no shortage of supplies. It’s also important that these materials are easily accessible because it may be difficult for someone who is elderly or otherwise physically impaired if they need help getting up from an awkward position (such as lying down). Find a quiet place where you can sit comfortably for about five minutes without being interrupted by others in order for them not to influence their results too much.”
2. Equipment and Cuff Position
The position of the cuff can have a big impact on your reading. If it’s too high or low on your arm, it may not provide an accurate reading. It’s important to make sure that the upper edge of the cuff rests just above where your elbow bends and about 1 inch below where it bends again (this is called “mid-upper arm”). You should also make sure that nothing presses into your bicep while measuring your blood pressure–this would cause an incorrect reading as well! Make sure you’re using a cuff that’s appropriate for both arms (left vs right). There are different sizes available depending on whether someone has small or large wrists/biceps; if they’re unsure which size would work best please ask us before purchasing so we can help guide them towards picking out what will work best for them!
3. Take Your Blood Pressure
Now that you’ve learned how to check your blood pressure, it’s time to put everything into practice. First, make sure you have the correct equipment: a sphygmomanometer (or “sphyg”), which is essentially a large cuff with an inflatable bladder inside it; and a stethoscope (you can get by without one of these if you don’t have one). Next up is finding the right position for your arm when taking readings. It should be at heart level (just below the collarbone) and at least two inches away from any bones or joints in order for us to get accurate results. If possible, try sitting down while doing this–it will help keep things steady! Once we’ve got our patient settled into place and ready for measurement, it’s time for inflation! Make sure not too much air gets pumped into the cuff–you want enough pressure around their arm so that blood doesn’t escape through capillaries or veins but not so much that they feel uncomfortable or experience pain during testing period.”
4. Record Your Results
After you’ve taken your blood pressure, it’s important to record your results. This can be done on a notepad or in a journal. You should also keep track of what you ate before taking the reading and how much caffeine was in your system at that time. Your doctor will need this information when they are prescribing medication for you later on down the road (if needed).
Now that you know how to check your blood pressure, you can use these tips to help keep yourself healthy. Remember that the best way to keep your heart healthy is by eating right, exercising regularly and getting enough sleep every night. If you have any questions about what else could be causing high blood pressure or hypertension, please contact us at our office today!